Designing digital typefaces
My interest in typography started a long time ago when I was studying in London at London College of Communication. The school was originally called London College of Printing, and you can still feel that printing heritage in the way typography is taught there.
We had many workshops connected to type and print. I loved letterpress workshops, the process of working with physical letters, arranging them, playing with spacing, and experimenting with different compositions. But even though typography was everywhere around us, I never actually learned how to create a digital font. We printed letters, experimented with layouts, and explored typography in many ways - but making a font file itself was something I never did.
We had many workshops connected to type and print. I loved letterpress workshops, the process of working with physical letters, arranging them, playing with spacing, and experimenting with different compositions. But even though typography was everywhere around us, I never actually learned how to create a digital font. We printed letters, experimented with layouts, and explored typography in many ways - but making a font file itself was something I never did.
Almost ten years after graduating, I decided to try making my own typeface.
1st experiment - Good luck have fun


This typeface was created during a workshop. It includes lowercase letters of the English alphabet.
A slightly awkward new mouse made a strange movement that became the letter “a”. At the same time, the unusually large screen made the letter look very small — only 8 pixels high.
Inside that tiny “a” I noticed an interesting pattern in the negative space, and I started building the rest of the letters based on that pattern.
The font was made using FontStruct, a website where you can easily experiment and build your own typefaces using simple blocks. It’s a very playful tool and a great way to start exploring type design.
You can view and download the typeface for free on FontStruct here:
https://fontstruct.com/fontstructions/show/2766368/good-luck-have-fun
2nd experiment - Torn mono
I struggled for a while to find a concept for my final project in the display type course, so I decided to recreate a typeface I had already tried to make twice before by tearing paper - first was uni project and second logo for @tartpa


this time I set a simple framework for the letters based on an A6 format. The x-height was a square, and the remaining space above and below was used for ascenders/ descenders.


Within this structure, I created the letters by tearing paper by hand, mostly following intuition rather than precise control.


Some letters had to be torn several times before the shape felt right. I wanted to resolve the forms as much as possible in the physical process, rather than refining them later in a digital format. Even though it feels like there aren’t that many possible variations, the smallest movement can completely change the character of a letter.


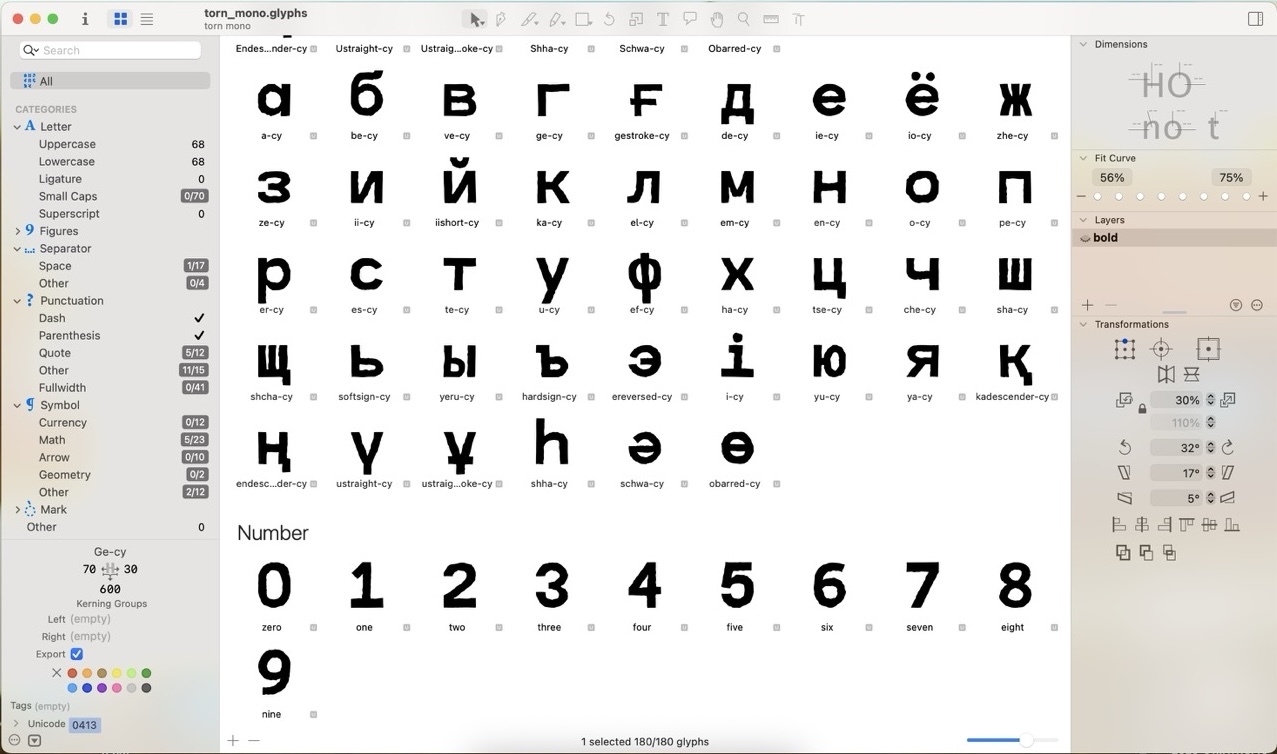
In the end, I created lowercase letters for the Kazakh, Russian, and English alphabets. Later I added what I considered the essential glyphs, numbers and uppercase letters.


I then took the photo of the letters laid out on the floor above and brought it into Photoshop and Illustrator, converted them into vector shapes, and exported them as SVG files. Then I started experimenting with the trial version of Glyphs App.
Since all the letters followed the same grid, I decided to make the font monospaced to simplify the process — or at least that was my idea.
The program wasn’t very intuitive at first, and I didn’t feel like watching long tutorials. In the end, the most helpful resources were the articles from the Glyphs App website itself - esp their guide on how to properly import letters from Illustrator.


Tada!! The display font came to life. I like it — and if you do too, you can download it using the link below.
It was a great experience, but I also realized that type design might not really be my thing. But the physical process of tearing letters from paper was really enjoyable
link to google drive (TTF/OTF)
It was a great experience, but I also realized that type design might not really be my thing. But the physical process of tearing letters from paper was really enjoyable
link to google drive (TTF/OTF)


few photos from the course with Alexey Vanyashin. Photo credits: @lcdswat.


Photography and editorial — Natasha Savicheva
All text, photo, and video materials belong to their owners and are for demonstration purposes only. Please do not use them in commercial projects.
All text, photo, and video materials belong to their owners and are for demonstration purposes only. Please do not use them in commercial projects.